
Getting Seeds to Sprout Right Every Time
If you’ve ever tried testing or growing seeds, you know how unpredictable germination can be. Some seeds shoot up quickly, others take forever — and a few don’t grow at all. That’s where Brown Germination Paper can make life easier. It’s specially made to give your seeds an even, healthy start so you can get consistent germination results every time.
At Laxmi Industries, we’ve been making specialty-grade papers since 2004 in Hyderabad, India — including seed germination paper, filter paper, and pollination bags. Over the years, we’ve seen how the right paper can make a real difference for researchers, farmers, and seed producers. Our goal has always been simple: do what you love and love what you do — and that passion goes into everything we make.
In this guide, let’s walk through how to use Brown Germination Paper the right way — step by step — so you can grow confidently and see steady, reliable results.
What Exactly Is Brown Germination Paper?
Think of it as a specially designed testing paper for seeds. It’s not your ordinary paper towel or notebook sheet — it’s made from pure cellulose fibres, giving it the perfect mix of strength, absorption, and breathability.
The paper holds just the right amount of moisture, keeps it evenly distributed, and prevents seeds from either drying out or drowning. At Laxmi Industries, we manufacture Brown Germination Paper that stays strong when wet and delivers uniform results batch after batch. That’s why many agricultural institutes, testing labs, and seed companies trust it for accurate results.
Step-by-Step: How to Use Brown Germination Paper for Best Results
Step 1: Set Up a Clean Space
Find a clean surface where you’ll do your germination test. Wash your hands or wear gloves — even a little dirt or oil can affect your results. Keeping your setup tidy ensures more reliable data.
Step 2: Cut and Label Your Paper
Cut the paper into sheets that fit your test trays or containers. Write down basic details like the seed name, date, and test number on one corner. It saves time later when you’re analysing results.
Step 3: Moisten the Paper Evenly
This part matters most. Dip the sheet in clean, distilled water, then squeeze gently — it should feel damp, not soaking wet. Uneven moisture is the biggest reason for inconsistent sprouting, so take a moment to make sure every part feels the same.
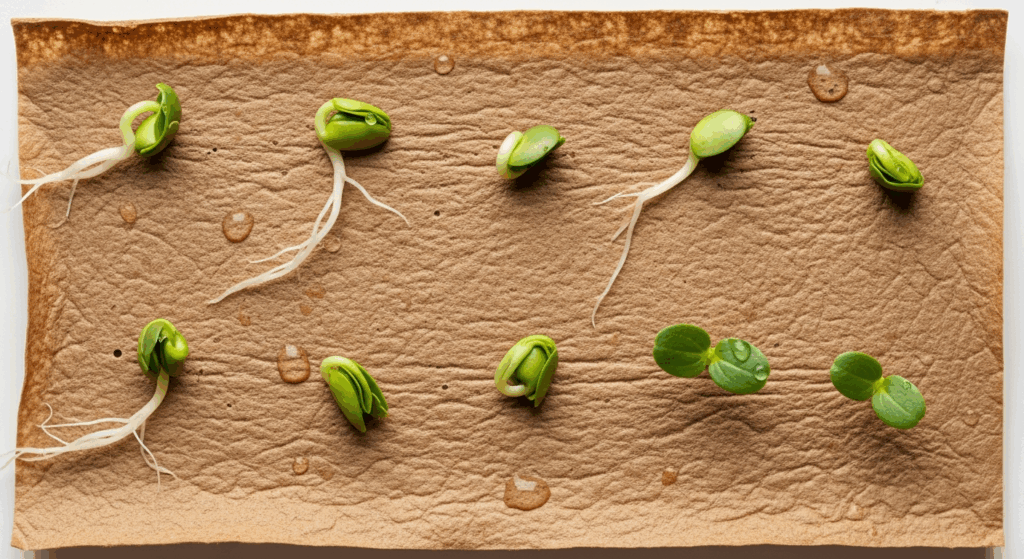
Step 4: Place the Seeds
Lay your seeds gently on the paper, leaving enough space between each one. Overcrowding can stop airflow and cause fungal growth. A small gap helps each seed breathe and grow freely.
Step 5: Cover and Roll (If Needed)
You can use a few methods here:
- Top-paper method: One sheet on the bottom, another on top.
- Between-paper method: Sandwich the seeds in between.
- Roll-towel method: Roll the paper gently and stand it upright.
All these methods work fine — just keep the moisture consistent.
Step 6: Keep It in the Right Conditions
Put the paper setup inside a germination chamber or a warm place. The ideal temperature is usually 20–30°C, depending on your seed type. Make sure it’s away from direct sunlight.
Step 7: Check Daily
Every day, check the paper to ensure it’s still damp. If it starts drying, use a spray bottle to add moisture. After a few days (usually 5–10), count how many seeds sprouted and note your findings.
Why Choose Brown Germination Paper from Laxmi Industries
There’s no shortage of paper options, but here’s what makes ours stand out:
- Even moisture retention for steady germination
- Strong, tear-resistant quality even when wet
- Made from pure cellulose for accuracy and eco-friendliness
- Tested and trusted by seed labs and agricultural professionals
At Laxmi Industries, we believe in growing through innovation while staying humble. Every product we make reflects our values — quality, care, and consistency.
Practical Tips for Reliable Germination Results
- Always use distilled water — tap water may contain minerals that affect germination.
- Don’t let the paper dry out — check it twice a day in dry weather.
- Keep the setup covered but ventilated to maintain humidity.
- Handle seedlings gently when counting — they’re delicate!
These small habits help you avoid common errors and get results you can actually trust.
FAQs
1. Can I reuse Brown Germination Paper?
It’s best not to. Once used, the paper might contain residue or pathogens that can affect your next test. Always start with a fresh sheet.
2. How long can I store the paper?
If you keep it sealed and dry, it can last up to 18 months without losing its absorbency or quality.
3. What’s the difference between white and brown germination paper?
Brown germination paper is slightly denser and offers better moisture balance, especially for medium to large seeds. It’s often preferred for professional testing setups.
Conclusion
Consistency in seed germination isn’t luck — it’s about using the right tools and methods. Brown Germination Paper gives you the control you need to see stable, predictable results.
At Laxmi Industries, we’ve spent over two decades perfecting our specialty-grade papers to help growers, scientists, and testing labs get results they can rely on. When your process depends on precision, the right germination paper can make all the difference.
To know more about our range of seed testing products, visit
👉 https://laxmipaperind.com/